
This Super Mario Bros. 2 (Japan) World 8 walkthrough covers every stage from World 8-1 to World 8-4, including wind-assisted jumps, hidden blocks, the sky castle, the five-part final castle, and the real Bowser. Use the original maps and tips below to clear World 8 without missing its most useful secrets.
World 8 at a Glance
| Level | Main challenge | Key secret |
|---|---|---|
| World 8-1 | Paratroopas, Hammer Brothers, and wind | Hidden 1-Up and a backward Warp Zone to avoid |
| World 8-2 | Hidden blocks and the aerial flagpole | Coin room F and the vine to World 8-3 |
| World 8-3 | Cloud platforms, Lakitu, and Hammer Brothers | Coin Heaven B, Starman, and a multi-coin block |
| World 8-4 | Five-part castle and the real Bowser | Correct pipes and the final route |
Super Mario Bros. 2 Japan World 8-1 Walkthrough



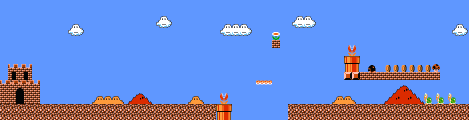
Jump over the Piranha Plants, stomp the Buzzy Beetle, and kick its shell through the enemies ahead. The seventh question block contains a power-up. If you miss it, wait above and let it bounce back before collecting it while avoiding the Koopa Paratroopas.
Wind and Hammer Brothers
Use the gust around the third pipe to jump over the block wall and land on the Red Koopa Troopa. Kick its shell into the approaching Buzzy Beetles. When the wind stops, stomp all three Paratroopas carefully to reach the top of the first pipe and avoid the Piranha Plant and Bullet Bills below. Kick a Buzzy Beetle near the Bill Blasters to knock out the Hammer Brother.
Power-up and the backward Warp Zone
After the second pipe, dash left and jump between the pipe and the edge of the screen for a power-up. Cross the small gaps at full speed to reach the Koopa Paratroopa. The Hammer Brothers can be jumped over when they are not throwing hammers, or passed underneath as they jump.
Hidden 1-Up and the pipe to avoid
A hidden 1-Up block is directly adjacent to the brick staircase at the beginning of the next part. Be careful with the second pipe before the tiny mid-air block island: it leads to Swim Area B and then a backward Warp Zone to World 5. If you want to avoid going back, let the timer run out instead; you will lose a life, but you will not return to World 5.
Super Mario Bros. 2 Japan World 8-2 Walkthrough
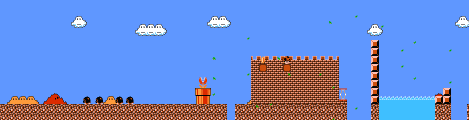
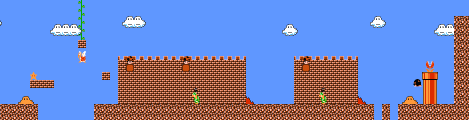
Jump from the falling platform and hit the floating brick for a power-up. The wind is strong and the wall is tall, so bounce from the Spring as high as possible. Flying over to the small solid-block steps is often easier than landing on top of the wall.
Vine to the flagpole
The vine in the highest brick leads to the flagpole. Bounce off the Koopa Paratroopa, hit the brick, land carefully, and climb. Do not destroy the empty brick you need for the climb, or you will enter a dead end filled with hazards. The hidden blocks there contain Poison Mushrooms, so leave them alone.
Coin room F and World 8-3
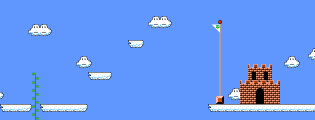
The pipe at the end leads to coin room F, but it returns you to the middle of Part B for another escape attempt, so watch the timer. The special aerial flagpole is the entrance to the cloud-filled sky level of World 8-3.
Super Mario Bros. 2 Japan World 8-3 Walkthrough



For the long gap, the top cloud is usually safer than the Red Spring because it avoids mid-air enemies. Start by taking down Lakitu, jump on the Green Koopa Paratroopa near the cloud, then dash and leap from the top cloud. Aim for the Red Koopa Paratroopa first, then go for the falling platform.
Lakitu and the hidden Poison Mushroom
Lakitu will respawn, so avoid the Koopa Troopas and falling Spinies, reach the solid-block pile, and knock down Lakitu before moving on. In the next part, watch the Hammer Brothers and the hidden Poison Mushroom above the second one. If you do not have the Fire Suit, stick to the right until the camera removes the last Hammer Brother, but keep the hidden power-up and the vine to Coin Heaven B in view.
Starman and the multi-coin block
Take the hidden Starman and dash to the Red Spring for a long jump that avoids the Paratroopas. The remaining Hammer Brothers should be easy to handle while invincible. At the end, pop the right hidden block and let the Poison Mushroom fall away; the left block is a multi-coin block. Climb above it, stick to the far-left for more running room, and jump to the balance platforms at the farthest right point of the right block.
Super Mario Bros. 2 Japan World 8-4 Castle Walkthrough

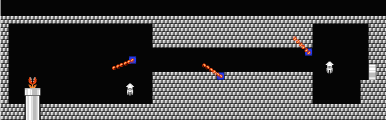
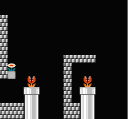
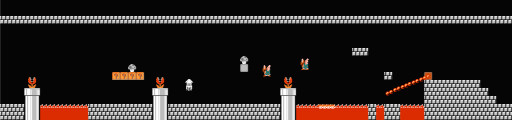

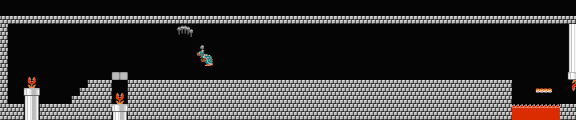
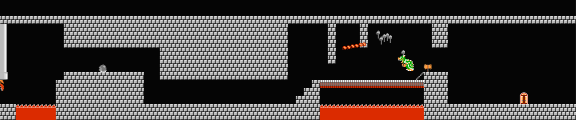
The first jump is trickier than it looks. Jump down to the bottom, build full speed, and leap across while avoiding the Fire-Bar. To get through the first section, go down the first pipe with the platform above it. Run past the first two Fire-Bars, then jump as soon as you reach the second lava pit to avoid the hazards.
Underwater and hidden power-ups
Swim carefully through the Fire-Bar and Blooper area, luring the Bloopers away so you do not fight both at once. Do not miss the hidden power-up on the left side of the room. Walk off the ledge to the right and move left in mid-air to land on the pipe.
Sprint through the maze
The third pipe in this area takes you back to Part B, so skip it. This maze looks linear, but you must be sprinting when you approach the Fire-Bar. Wait on the moving platform until it is within one block of the next platform, then sprint and jump across without stopping. The low ceiling is not a loop, so stay alert, especially with Luigi. Bounce off the Green Koopa Paratroopa to clear the lava pit and grab the power-up above the pipe.
Fake and real Bowser
Do not fall into the Piranha Plant’s trap, or you will return to the second pipe in Part A. The fake Bowser uses hammers too, so pelt him with fireballs or make a run for it. The real King of the Koopas is even tougher: the awkward ceiling and hammer throws make running underneath the only viable option without fireballs.
World 8 Tips for Beginners
- Do not take the second pipe in World 8-1 if you want to avoid World 5.
- Use the top cloud instead of the Red Spring for the long gap in World 8-3.
- In World 8-4, go down the first pipe and sprint through the Fire-Bar maze.
- Running underneath is the safest way to finish the real Bowser without fireballs.
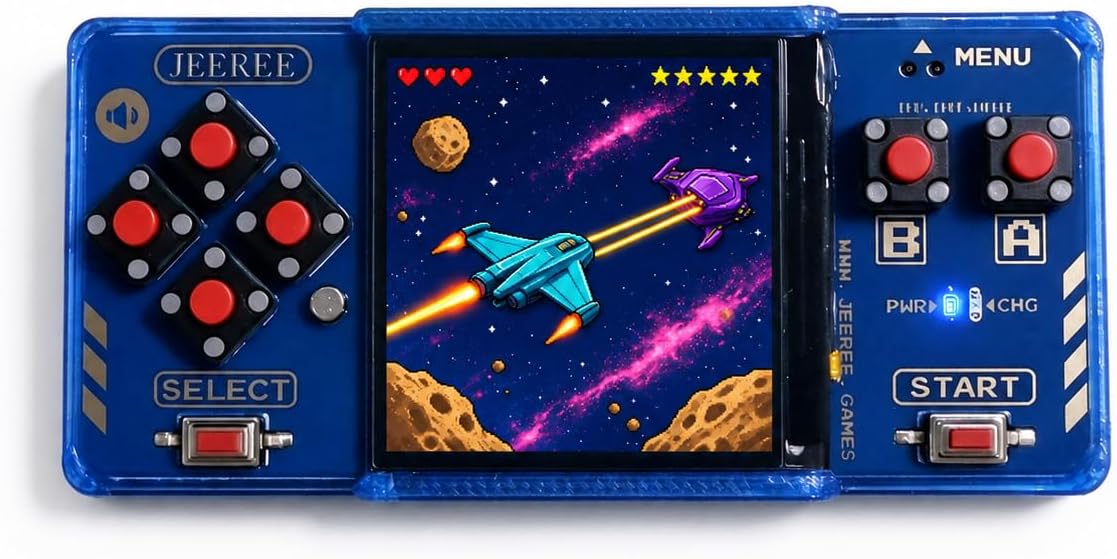
Keep Your Retro Games Pocket-Sized
If you enjoy revisiting classic 8-bit games away from your desk, take a look at the Jeeree Mini Retro Game Console. It combines a crisp 1.5-inch LCD with physical controls and USB-C loading for your own legally obtained ROMs, all in a 22g travel-ready design.
- 1.5-inch LCD
- USB-C ROM loading
- 22g travel-ready design
Super Mario Bros. 2 Japan World 8 FAQ
How do you avoid the backward Warp Zone in World 8-1?
Avoid the second pipe before the tiny mid-air block island. If necessary, let the timer run out instead of using it; you will lose a life but will not return to World 5.
How do you cross the long gap in World 8-3?
Use the top cloud rather than the Red Spring. Take down Lakitu, bounce from the top cloud to the Red Koopa Paratroopa, and then aim for the falling platform.
What is the safest way to beat the real Bowser in World 8-4?
Run underneath him. The awkward ceiling and hammer throws make other approaches unnecessarily risky without fireballs.