
This Super Mario Bros. 2 (Japan) World D walkthrough covers the final secret Letter World, including Hammer Brothers, hidden 1-Ups, Coin Heaven C, Bullet Bill cannons, and the last Bowser battle. Use the original maps and tips below to clear World D without missing its most useful secrets.
World D at a Glance
| Level | Main challenge | Key secret |
|---|---|---|
| World D-1 | Hammer Brothers and long gaps | Hidden 1-Up and coin room G |
| World D-2 | Upside-down Piranha Plants and Red Springs | Coin Heaven C, coin room I, and a life loop |
| World D-3 | Bullet Bills and Hammer Brothers | Use cannons and sprite limits to your advantage |
| World D-4 | Fire-Bars, fake Bowser, and the final battle | Hidden power-ups and the last route |
Super Mario Bros. 2 Japan World D-1 Walkthrough
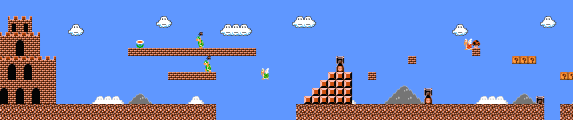
World D opens with two Hammer Brothers and a power-up positioned too far to the left to collect comfortably. Defeat the Hammer Brothers, then clear the long gap by bouncing off the Green Koopa Paratroopa. Arriving with the Fire Suit makes this opening much easier.
Hidden 1-Up and coin room G
A hidden 1-Up block sits above and slightly to the right of the third floating brick containing a Poison Mushroom. Jump from the second floating brick, then bounce on the Red Koopa Paratroopa to reach it. Drop down the first pipe to find coin room G. The floating brick just before the last pipe contains a power-up: dash left from the right edge of the ground block and jump to pop it out.
Wind and the narrow gap
The wind picks up near the end of this world and may interfere with your flagpole jump. Flatten the Koopa at the top of the stairs, kick its shell, and run at super speed to clear the narrow gap.
Super Mario Bros. 2 Japan World D-2 Walkthrough
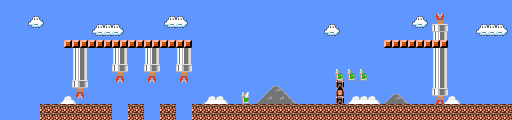
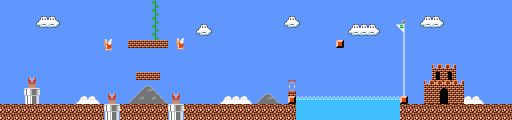
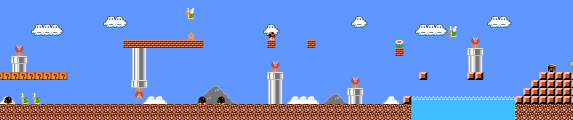
Upside-down Piranha Plants cause trouble in World D-2. Hop across the gaps and avoid the plants. When you return from Coin Heaven, you will arrive in front of the tall pipe at the end of this section; drop down to visit the exclusive coin room I.
Coin Heaven C and the life loop
Bounce off the Koopa and climb the vine to reach a pair of bonus areas, starting with Coin Heaven C. This is your last good chance to gain lives. Coin Heaven drops you off at the highest pipe in the section, with both a regular and an upside-down Piranha Plant in the same column, so you can revisit the coin room and Coin Heaven multiple times for a potential 80 coins per loop.
Red Spring and the floating block
Defeat the Red Koopa Paratroopas so sprite limits do not prevent the Red Spring from appearing. The floating block at the end is a narrow but crucial platform, so carefully jump to the block and hop to the flag.
Super Mario Bros. 2 Japan World D-3 Walkthrough



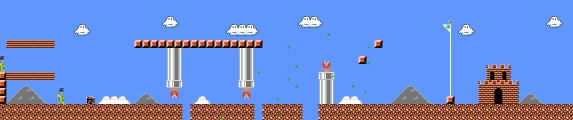
Stand next to the Bullet Bill Cannon to stop it from releasing shots while you collect the power-up in the area. A Hammer Bros. duo appears toward the end, so dash and jump over them between the hammers.
Use Bullet Bills and sprite limits
Wait by the first group of cannons for a couple of Bullet Bills to fire to the right, then chase after them through the level. Their presence can prevent some Hammer Brothers from spawning, and they also provide useful jumping-off points. A row of nine bricks sits at the end of the first wall; in All-Stars, these are hidden coin blocks, so you need to create your own safety zone against the Hammer Brothers.
Tall stack and cannon jumps
Wait at the top of the tall stack of blocks for the Hammer Brother to close in, then jump off the blocks and stomp or pass. When leaping from one cannon to the next, make sure a Bullet Bill is not launching from the next cannon up.
Super Mario Bros. 2 Japan World D-4 Castle Walkthrough
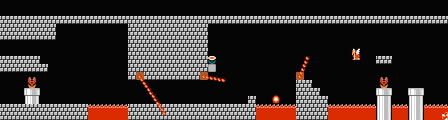
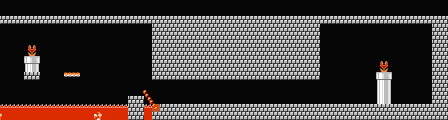

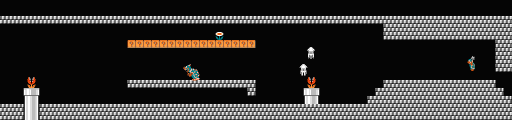
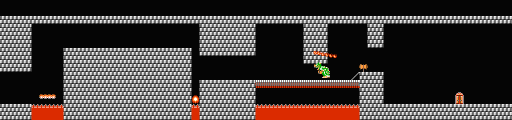
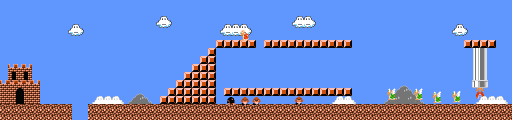
Jump across the first gap as soon as the Fire-Bar clears away, then hit the ground dashing and run to safety. Drop down the pipe at the end to continue to the outdoor Part C.
Poisonous hidden block and Coin Room H
Wait for the Hammer Bros. on the left side and stomp them. Beware of a hidden block with a poisonous mushroom between the third Piranha Plant and the staircase. Move right until the Piranha Plant comes into view, then jump when the pipe is clear to reach Coin Room H before the final room.
Fake Bowser and the final Bowser
Run under the fake Bowser’s brick platform, then jump up and double back to collect the power-up. The second pipe in this area takes you back to the strangely placed first pipe in Part A. The final landing is higher than World 2-4 and includes a Podoboo, so time it carefully. Hit the last Bowser with fireballs or jump over him when he retreats to complete the last Lost Level.
World D Tips for Beginners
- Use the second floating brick and the Red Koopa Paratroopa to reach the hidden 1-Up in World D-1.
- Use Coin Heaven C and coin room I for one last life loop before World D-4.
- Let Bullet Bills help suppress Hammer Brothers in World D-3.
- Do not take the second pipe in World D-4 if you want to reach the final battle.

Keep Your Retro Games Pocket-Sized
If you enjoy revisiting classic 8-bit games away from your desk, take a look at the Jeeree Mini Retro Game Console. It combines a crisp 1.5-inch LCD with physical controls and USB-C loading for your own legally obtained ROMs, all in a 22g travel-ready design.
- 1.5-inch LCD
- USB-C ROM loading
- 22g travel-ready design
Super Mario Bros. 2 Japan World D FAQ
How do you get the hidden 1-Up in World D-1?
Jump from the second floating brick, then bounce on the Red Koopa Paratroopa to reach the block above and slightly right of the third floating brick.
How do you reach coin room I in World D-2?
Return from Coin Heaven and drop down the tall pipe at the end of the section to enter the exclusive coin room I.
How do you handle the Hammer Brothers in World D-3?
Use Bullet Bills to suppress their spawns and provide jumping-off points, then dash and jump over the Hammer Brothers between their hammers.